Creating an Anaconda environment
This article is a part of How to install and use Anaconda.
If your course needs to use other packages than those that comes installed by default in Anaconda, we recommend that you follow these instructions.
The easiest way to make sure the students have installed all the required packages is to prepare an environment file, that the students download and install on their computers. This way, the students will not have to install each package manually. This is less work for the students, and less trouble for your teaching assistants.
The steps involved are:
- Create a new environment
- Install all needed packages to this environment
- Export the environment to a
.yamlfile - Publish the
.yamlfile on your course page and direct your students to Working with course-specific environments
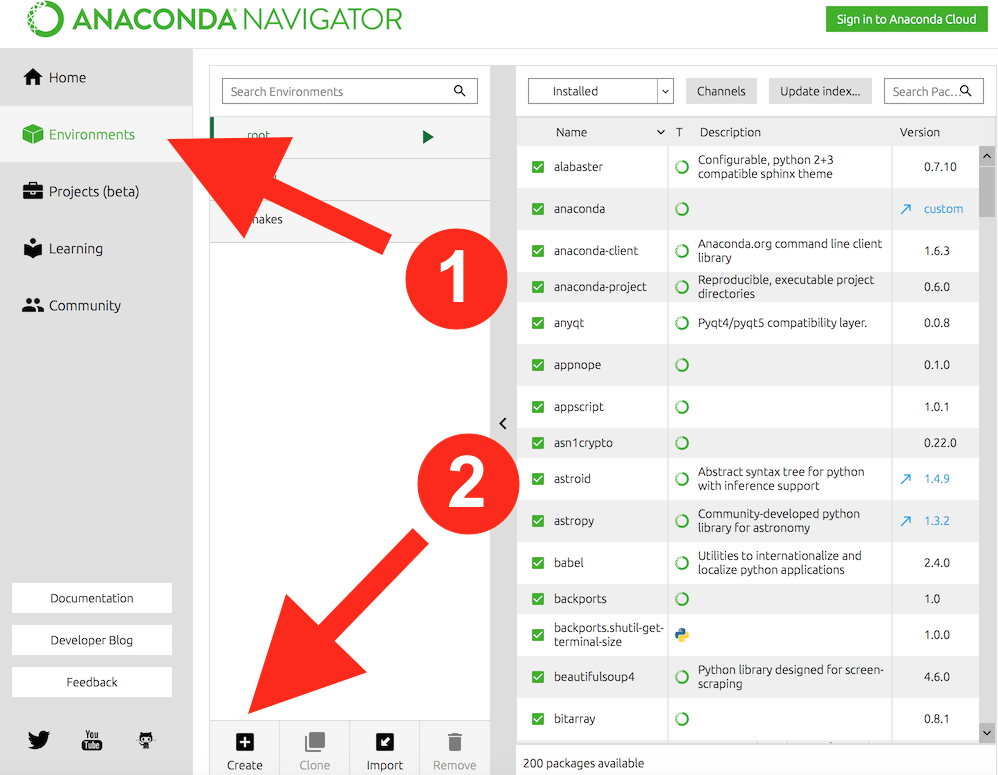
Step 1 of 4: Create a new environment
Open Anaconda Navigator and select the Environments tab in the left menu (1).
Click Create (2) and type a suitable name, we recommend using your course code and the current semester,
for example TMA4100h17.
Select the Python version you want to use and click Create. As of fall 2017, Python 3.5 seems to be more stable than 3.6.
Step 2 of 4: Install packages
You will need to install all packages that you are using, including those that are installed by default in Anaconda. A typical list includes at least:
- numpy
- scipy
- sympy
- matplotlib
Then proceed by:
- Select your freshly created environment.
- Select All from the drop-down menu.
- Use the search field to find your package.
- Tick the checkbox in front of the package name.
- Repeat for all packages that you want, we recommend to also include the
spyderpackage. - Click the Apply button in the lower right corner.
- Consider having a cup of coffee.
- Select Installed from the drop-down menu and verify that all packages are present.
For more information, refer to Managing environments in the Anaconda documentation.
Step 3 of 4: Export the environment
The instructions vary slightly between Mac, Windows, and Linux:
- Mac:
- Open Terminal from Launchpad, or from the Applications folder (look inside the Utilities folder).
- Run the following command, but use your own environment name instead of TMA4100h17:
conda env export -n TMA4100h17 -f ~/Desktop/TMA4100h17.yaml - This will create a file on your desktop.
- Windows:
- Open Anaconda Prompt from the Start menu.
- Run the following command, but use your own environment name instead of TMA4100h17:
conda env export -n TMA4100h17 -f M:\TMA4100h17.yaml - This will create a file in the top folder of your M: drive.
- Linux:
- Open a terminal window.
- Run the following command, but use your own environment name instead of TMA4100h17:
conda env export -n TMA4100h17 -f ~/Desktop/TMA4100h17.yaml - This will create a file on your desktop.
Step 4 of 4: Publish the .yaml file
Upload the .yaml file created in the previous step to your course page.
Then, instruct your students to download the file and install it by following the instructions Working with course-specific environments.