Installing software
This article explains how to download software from the Department's server and install it on your Mac.
If you don't need a step-by-step explanation, you can find the files in the software folder
in the department's file share (smb://felles.ansatt.ntnu.no/ntnu/ie-imf).
Step 0: Start VPN
If you are on campus, you can skip this step.
Start the VPN program (Cisco AnyConnect VPN), and log in with your NTNU username and password. If VPN isn't installed, you need to install it.
Step 1: Download the software
Go to Finder, and choose Connect to Server… from the Go menu:
In the field Server Address, type
smb://felles.ansatt.ntnu.no/ntnu/ie-imf
then click Connect.
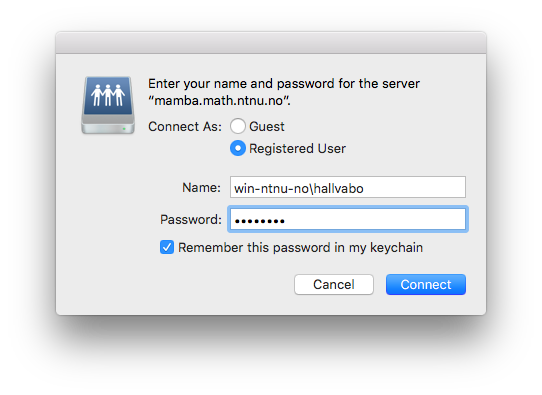
If you are asked for username and password, use the following values, and substitute YOUR_USERNAME with your NTNU user name:
| Username | win-ntnu-no\YOUR_USERNAME |
|---|---|
| Password | your regular NTNU password |
If you check the box Remember this password in my keychain you will not be asked for a password the next time you connect to the software share.
Open a Finder window, and look for the mounted network share ie-imf, then browse to the software folder, where you will find the Mac folder. There you will see a list of folders, each containing software installation files:
Step 2: Install the software
Browse to the folder containing the software you want to install. This folder will usually contain a few files:
- A file called README. If this file exists, you need to read and follow the instructions inside this file to install the program.
- A file with a name that ends with
.dmg,.pkg,.mpkgor.iso.
Unless the README file tells you otherwise, double-click the dmg/pkg/mpg/iso file to start the installation, then follow the instructions on the screen.


